vrijdag 25 mei 2012

Silly girls

Hi all!
Finally we have some lovely, warm and sunny weather over here! 
So needed some sunshine!
Today a quick post with a fun layout of my two girls, acting silly.
I guess they were tired of me taking their photo's!LOL

Inspiration for this page was the colored thread.
Misted and painted the background.
Made the flowers and used some naked Dusty Attic chippies:
Mini Branches DA 0439
Mini Wire Dress form DA 0670

And some details:


Enjoy your day!
Ingrid xxx


maandag 21 mei 2012

layout for co-worker

Hi all!
Hope you all are enjoying this day?
Finally we had some sunshine today and it's getting warmer! Too bad I had to work today!lol
My co-worker asked me to make a white/grey page of her and her husband so she could frame it.
How could I refuse?
Finished it a week ago already but today I could give it to her on work and she loved it!
So love to give gifts and see happy faces!

Misted and stamped the background.
Used some Dusty Attic chippies: 
decorative frame #1 DA 0207
mini doily set DA 0474
mini key DA 0322
mini keyhole DA 0323
Made the lace flower and the thread flowers.

And some details:


Have a creative and sunny day!
Ingrid xxx

zondag 20 mei 2012

Dusty Attic ATC Swap May

Hi all!
Made these ATC's for the May Swap at Dusty Attic.
Never did one before but I had a lot of fun making them!


mini corner #2 DA 0553

fancy trim #1 DA 0433


mini keys & locks DA 0679

mini corner #1 0321

fancy trim #1 DA 0433

Have a wonderful day!
Ingrid xxx


vrijdag 18 mei 2012

dreams

Don't know if this sounds familiar to you?
Most of my pages begin with something that inspired me.
This can be a color, a photo, an embellishment, a shape, a flower, a piece of thread, a branch, etc,etc.
I begin with that little piece of inspiration and start to build from that.
For this page I was inspired by the lovely flower ribbon.
Stamped the background and did some stitching.
Used the gorgeous new Dusty Attic flowers (Dusty in Bloom, Bridal Veil DA 0805).
Added a photo of Tessa and a new page was born.


And some details:


Have a great weekend!
Ingrid xxx


woensdag 9 mei 2012

let's get loud!

Hi all!
Today a page about my daughter Tessa.
From the day she was born up until now, she always makes a lot of noise!
When she was younger and playing outside, I always heard were she was. 
I only had to leave my door open to hear her voice above all the other kids.
Even today,the way she walks up and down the stairs, open and closes doors and even just talking, you know she is there!
But the most decibels comes from her laughter!! When she laughs....oh my, it's so loud!!!
LOVE hearing that and it makes me and everyone around her laughing too!
I'm happy to catch that on photo and I just had to make a page about it!

Used a lot of Dusty Attic on this page.
Cogs #2, DA 0002
Chicken wire panel, DA 0177
Vintage keys, DA 0392
Dusty in bloom, Champagne kisses, DA 0801
Seriously....I'm in love with those goodies!
Misted the flowers to match the page colors.
Used some fabric for my background and made the stitched leaves.
Here are some details:


Have a happy day filled with sunshine!
Ingrid xxx

vrijdag 4 mei 2012

layout with tutorial

Hi everyone!
Today I want to share this layout with a tutorial how I altered the Dusty Attic door.


This is what you need:
 cardstock
raffia
gesso 
crackle clear medium
black ink
heat gun
glue
scissors

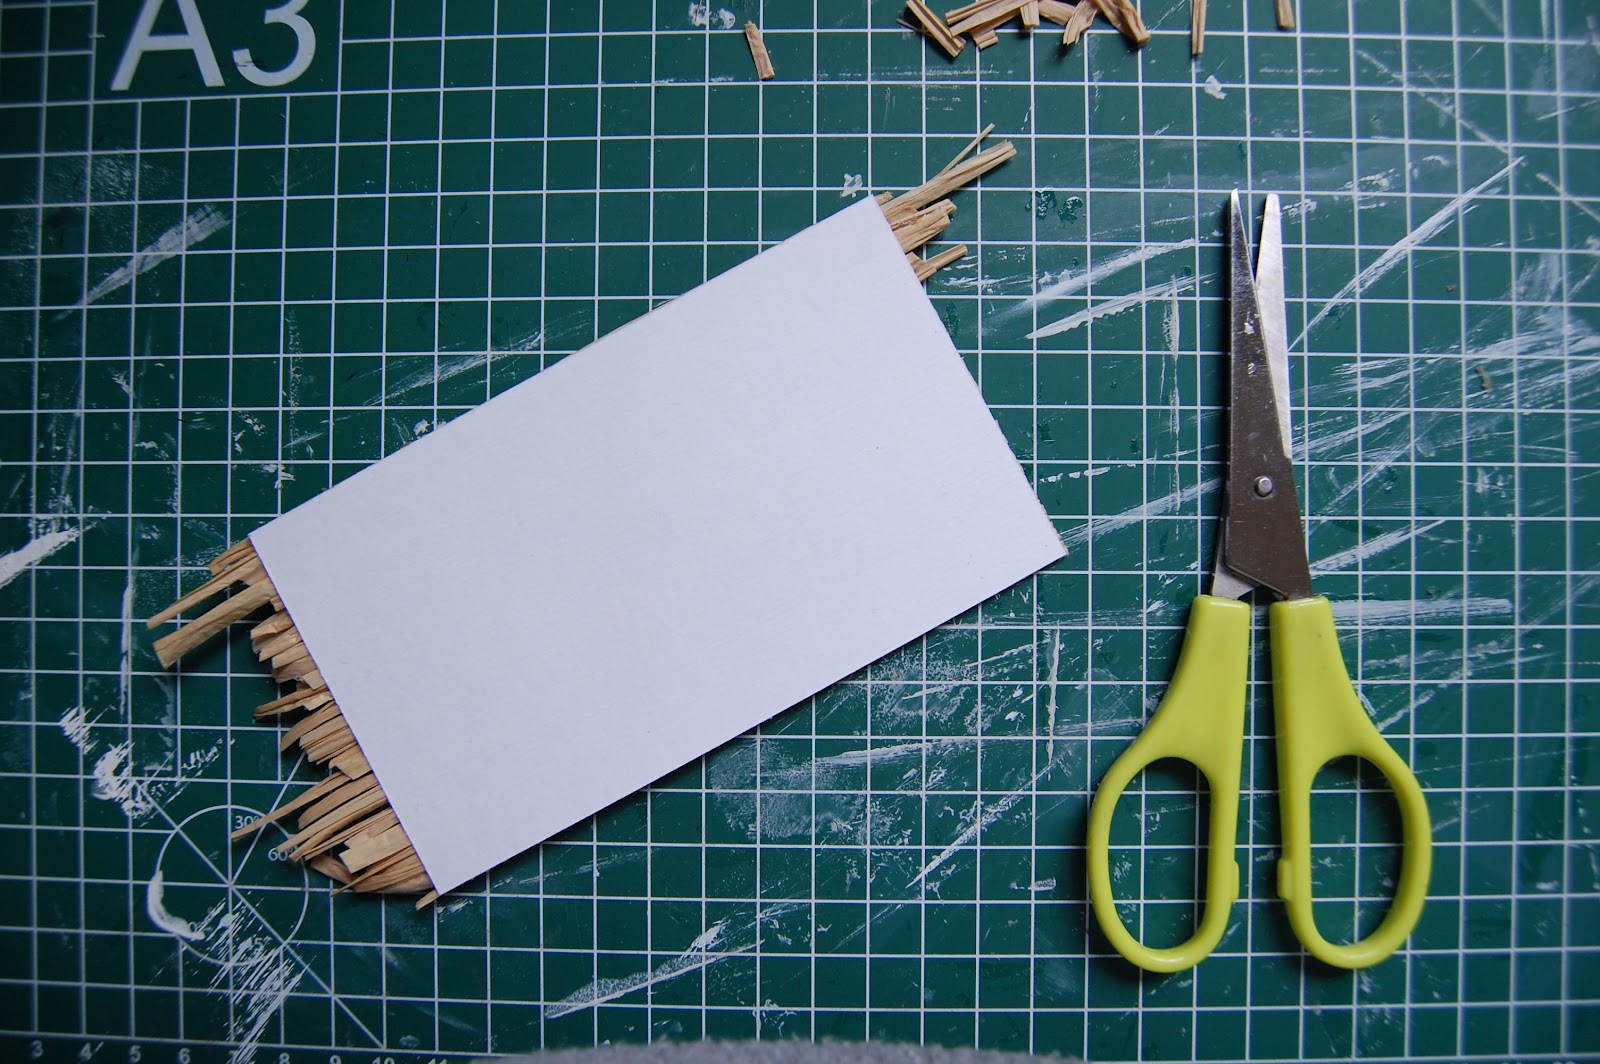
step 1: cut a piece of cardstock from about 3x5 inch.

step 2: glue down the raffia 

step 3: cover all of the 3x5 piece with raffia

step 4: cut of the raffia

step 5: glue the raffia on the door

step 6: give the door 2 layers of gesso

step 7: give the door a good layer with the clear crackle medium and heat it with the heat gun.
over heat it till you get the bubbles,this will give the door a nice texture.

step 8: ink the edges with the black ink

step 9: add another layer of crackle medium and let air dry.

step 10: again a thin layer of gesso and heat it up a bit so it will bubble a little more.
again ink the edges until you like the total look of the door.

And here is the final result: A great textured door.

Here are some close-ups of my layout:
Added the Dusty Attic door handle plate (painted it once with gesso).

This gorgeous letter box is also from Dusty Attic.

Made the fence from tapas sticks (Xenos). Cut off the forks and painted them with gesso.
Inked the edges and bundled them together with thin white metal thread.

Added some branches. Really love to use them!


Pfffff... are you still awake after this long post?LOL!!
Hope you enjoyed this tutorial as much as I enjoyed making it!

Have a wonderful, sunny and creative weekend!!

Hugs,
Ingrid xxx